1. Install Visual Studio Code
https://code.visualstudio.com/Download
Download Visual Studio Code - Mac, Linux, Windows
Visual Studio Code is free and available on your favorite platform - Linux, macOS, and Windows. Download Visual Studio Code to experience a redefined code editor, optimized for building and debugging modern web and cloud applications.
code.visualstudio.com
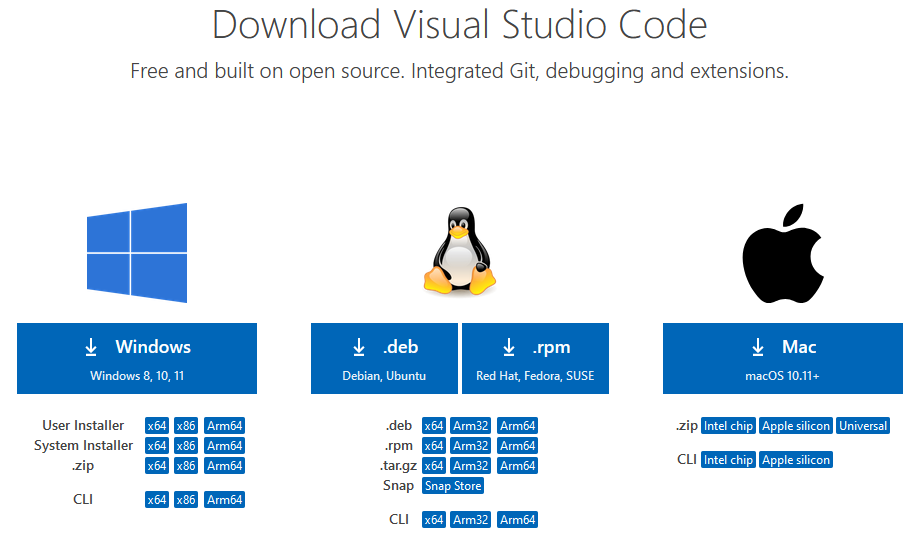
- User Installer : 현재 로그인한 사용자만 사용할 경우 C:\Users\<id>\Appdata\Local\ 아래 경로에 설치
- System Installer : 윈도우 모든 사용자가 사용할 경우 C:\program files\ 아래 경로에 설치
2. Install the C / C++ Extension (Ctrl + Shift + X)
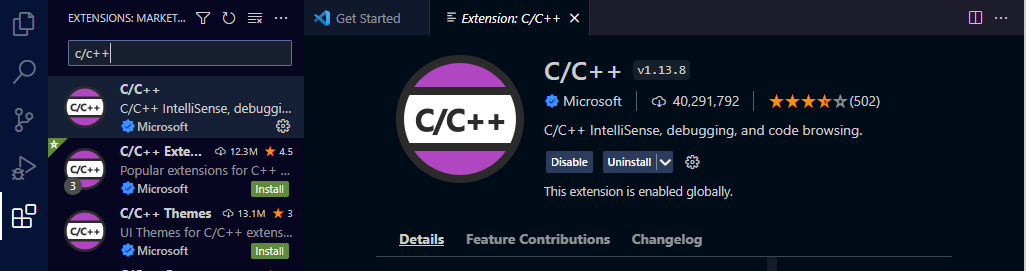
C / C++ Extension 은 Syntax Coloring, IntelliSense 등의 기능과,
C / C++ 프로그램 빌드, 디버깅 등을 위한 메뉴 인터페이스를 제공함 (실제 빌드 작업은 외부 컴파일러를 사용)
3. Install Mingw-w64 -> MSYS2 (Windows)
- Minimal list GNU for windows (for gcc, g++)
- meaning : https://en.wikipedia.org/wiki/MinGW
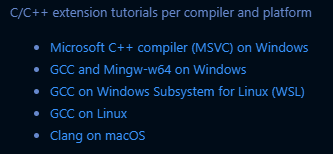
- Windows 10 기준 GCC and Mingw-w64 on Windows 선택
https://code.visualstudio.com/docs/cpp/config-mingw
< 2022.12.18 기준 >
GCC의 최신 빌드를 제공하는 MSY2를 통해 Mingw-w64의 최신 버전 설치
Mingw-w64 및 기타 유용한 C++ tool과 library 가 있음
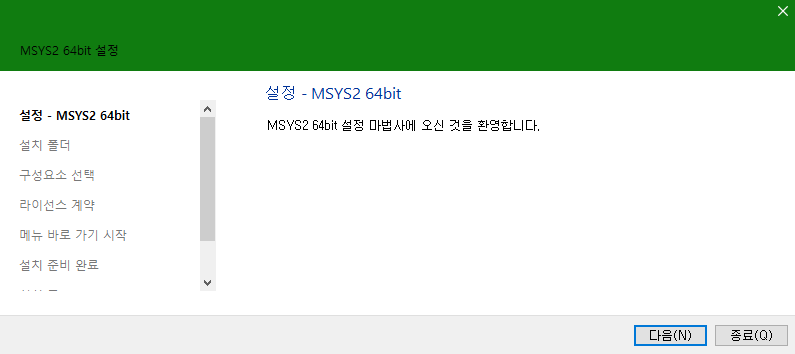
MSYS2 페이지에서 최신 installer 를 다운로드
이전까지는 Mingw-w64를 직접적으로 설치하였으나,
현재 기준 MSYS2 Tool을 설치
MSYS2는 기본 Windows 소프트웨어를 구축, 설치 및 실행하기 위한 사용하기 쉬운 환경을 제공하는 도구 및 라이브러리 모음
MSYS2는 GCC, mingw-w64, CPython, CMake, 메슨, OpenSSL, FFmpeg, Rust, Ruby 등에 대한 최신 네이티브 빌드 제공
MSYS2는 mingw와 cygwin에 기반을 둔 Compiler/Build 시스템
- Download here:
https://github.com/msys2/msys2-installer/releases/download/2022-06-03/msys2-x86_64-20220603.exe

- 기본 설치 이후 mingw 설치와 달리 msys2는 terminal 창을 통해 command를 통해 필요한 것들을 설치해야됨.
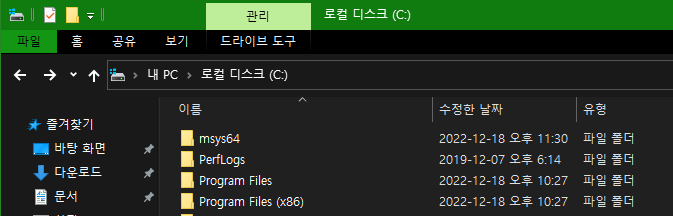
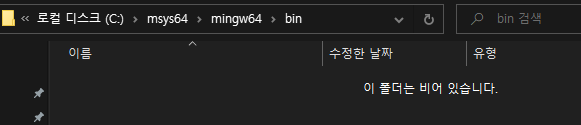
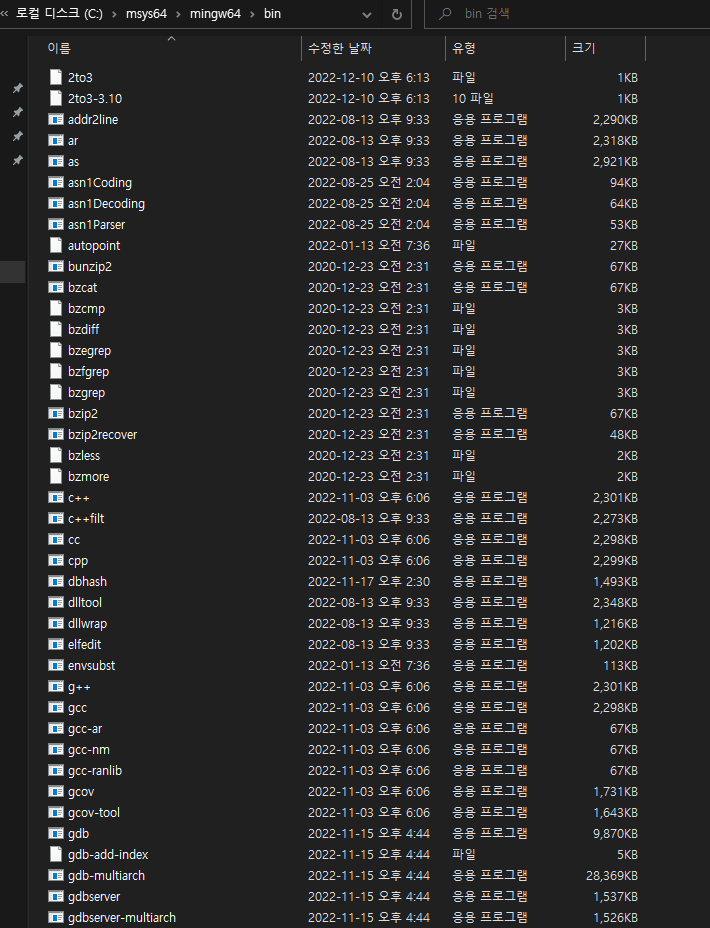
- 설치 경로 확인하게 되면 msys64 폴더 및 하위 파일 생성한 것을 확인
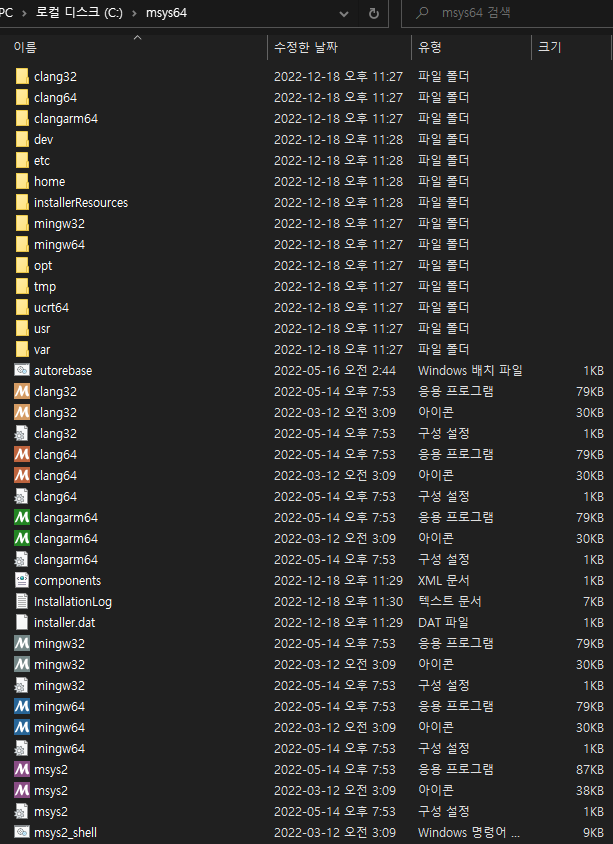
Compiler mingw64 폴더의 bin 폴더애는 아무것도 있지 않으며 command를 통해 gcc도 확인할 수 없음
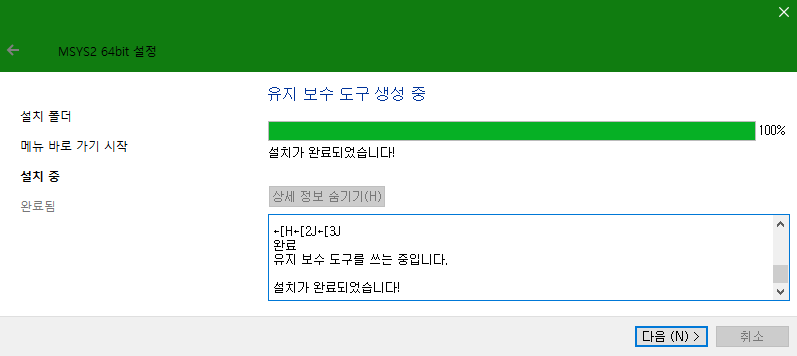
이것은 설치가 아직 끝나지 않았기 때문
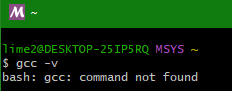
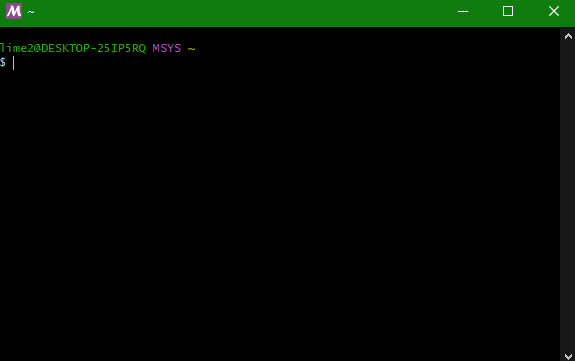
Terminal 에서 pacman 명령어로 마저 업데이트
pacman은 패키지 매니저(Package Manager)의 약어로 MSYS2에서 설치는 모두 이 명령어로 이루어짐
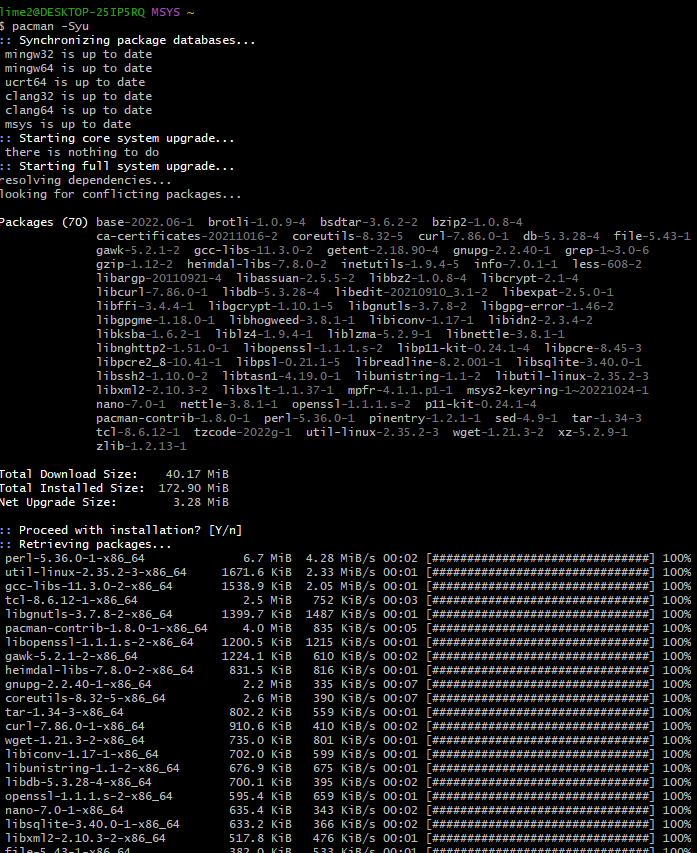
$ pacman -Syu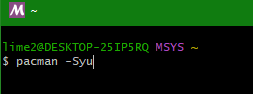
* 설치 과정 중 모두 Yes를 누른 뒤 자동으로 터미널 창이 닫힘.
다시 MSYS2를 실행하여 똑같이 명령어를 입력
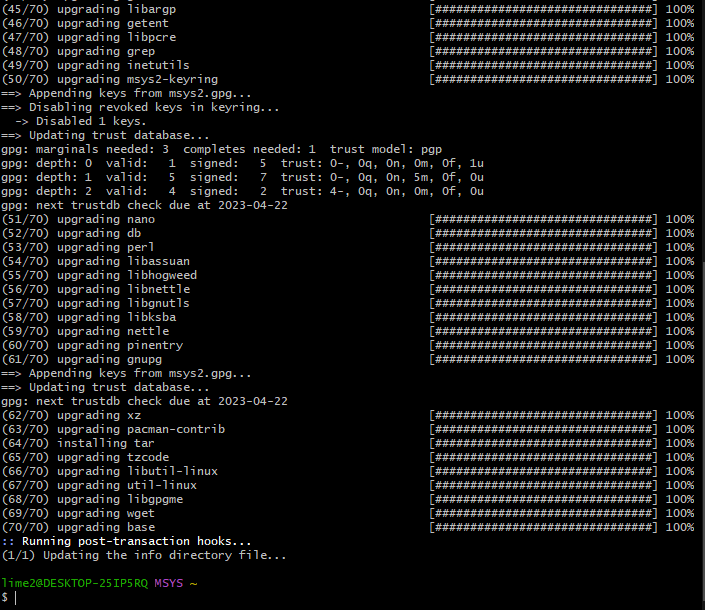
* 설치 후 아래 Command 입력
$ pacman -Su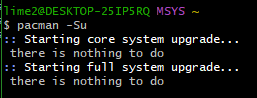
* 위와 같이 나오면 MSYS를 사용하기 위한 기본적인 설치와 업데이트가 완료
4. MSYS2 Terminal 에서 필요 유틸리티 설치
$ pacman -S <PackageName>
: 패키지를 설치하는 Command

$ pacman -R <PacakgeName>
: 패키지를 삭제하는 Command

$ --needed 옵션
: 필요할때만 설치 - 이미 설치되어 있을 경우 설치하지 않고
  설치되어있지 않은 경우에만 설치
- 설치 가능 패키지 확인:
https://packages.msys2.org/package/
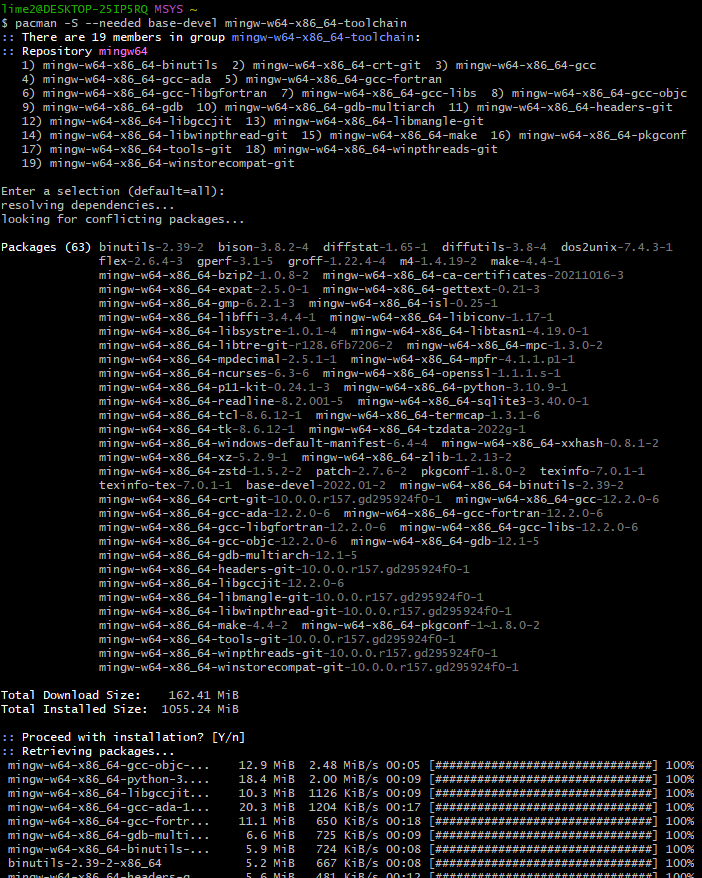
[mingw64 그룹 패키지 설치]
$ pacman -S --needed base-devel mingw-w64-x86_64-toolchaintoolchain은 package들을 그룹화 시킨 것 gcc, gdb, make 등이 기본 내장
그냥 Enter 치면 defalut로 모두 다운로드되는 것이고, 원하는 숫자로 선택하여 다운로드 할 수도 있으나 모두 다운로드
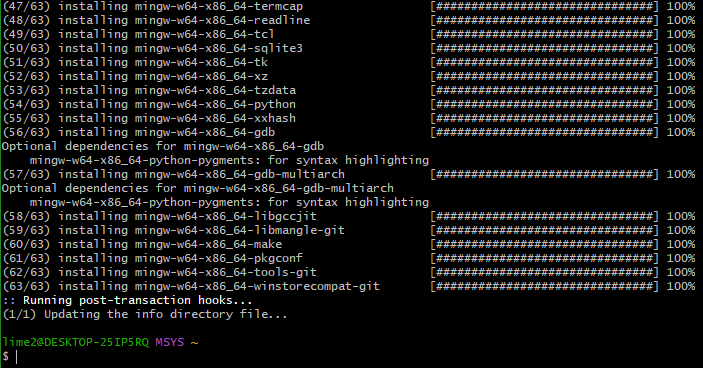
* msys2 설치 경로를 확인하면 compiler 파일이 생성된 것을 확인
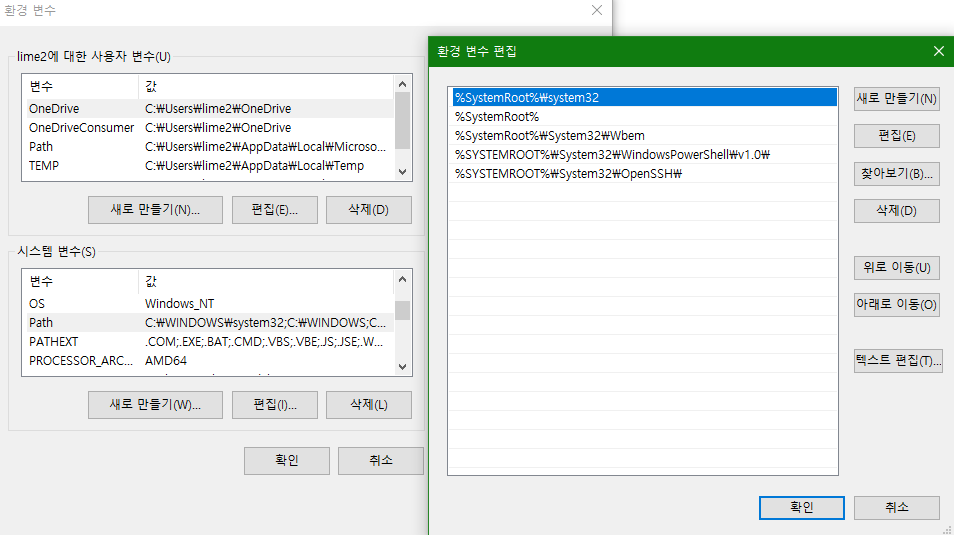
5. 환경 변수 세팅
* Compiler를 사용하기 위해 환경 변수에 PATH를 등록해주는 것까지 완료해야 마무리
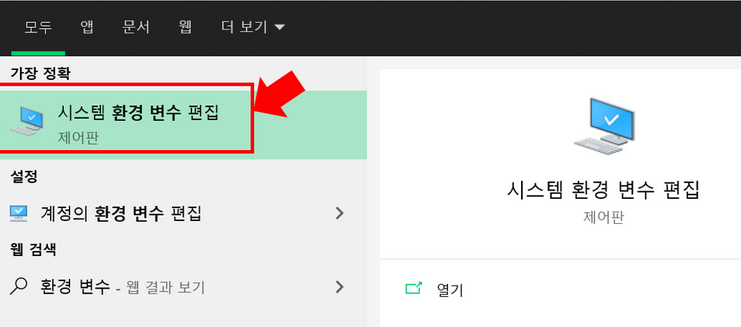
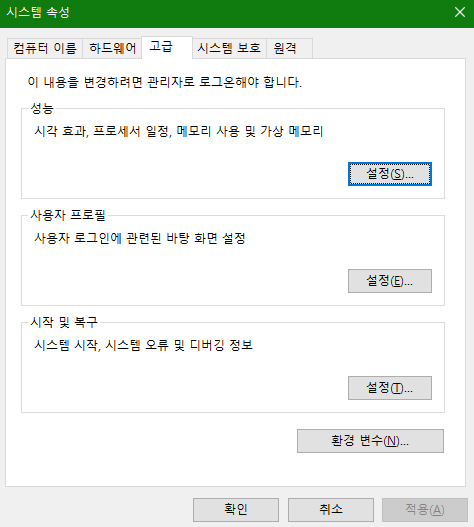
* 시스템 속성 [고급] 탭에 [환경변수] 박스 클릭
* 시스템 변수의 PATH를 찾아 아래와 같이 [새로만들기] 후 bin 폴더 경로로 설정


6. 확인
시작 검색에 cmd를 입력하여 명령프롬프트 창을 띄움. (Windows + R)
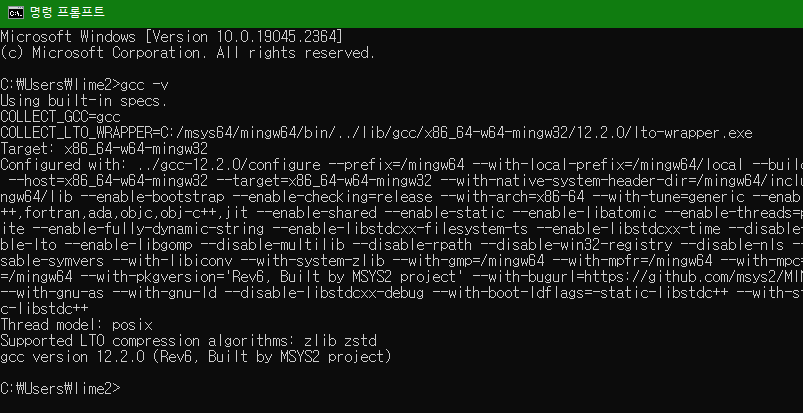
- 설치 완료
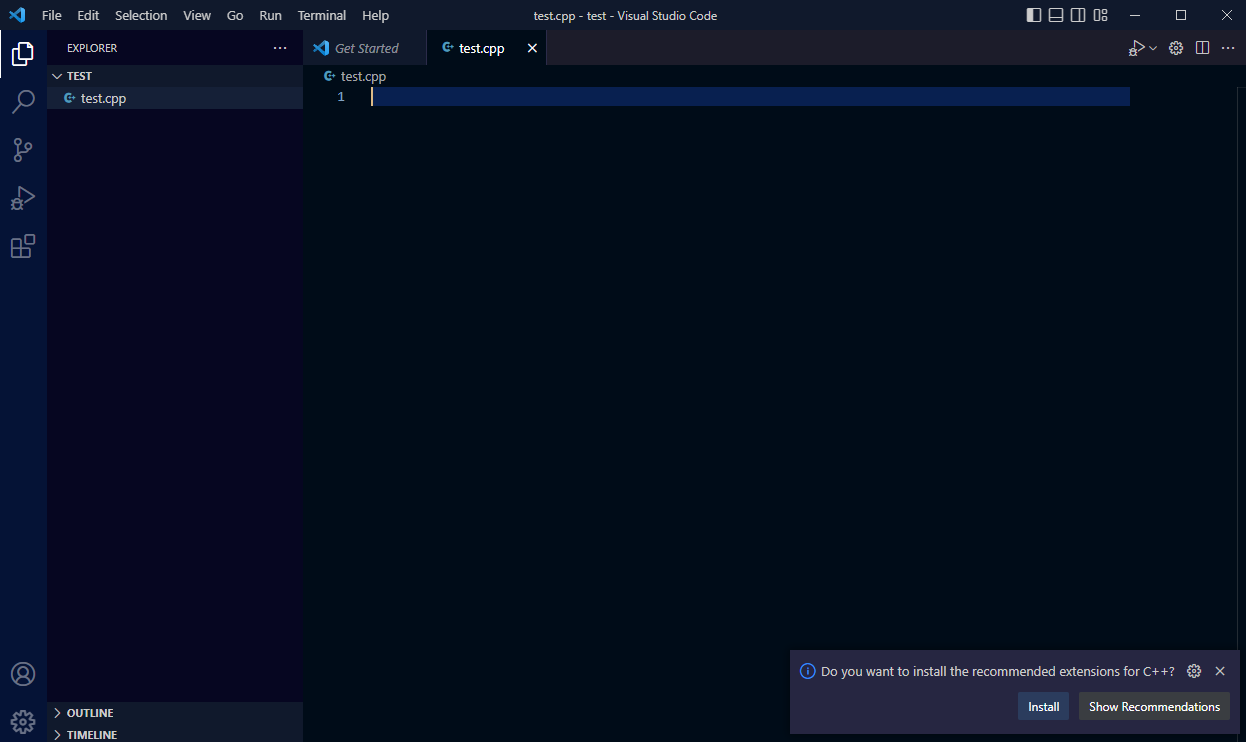
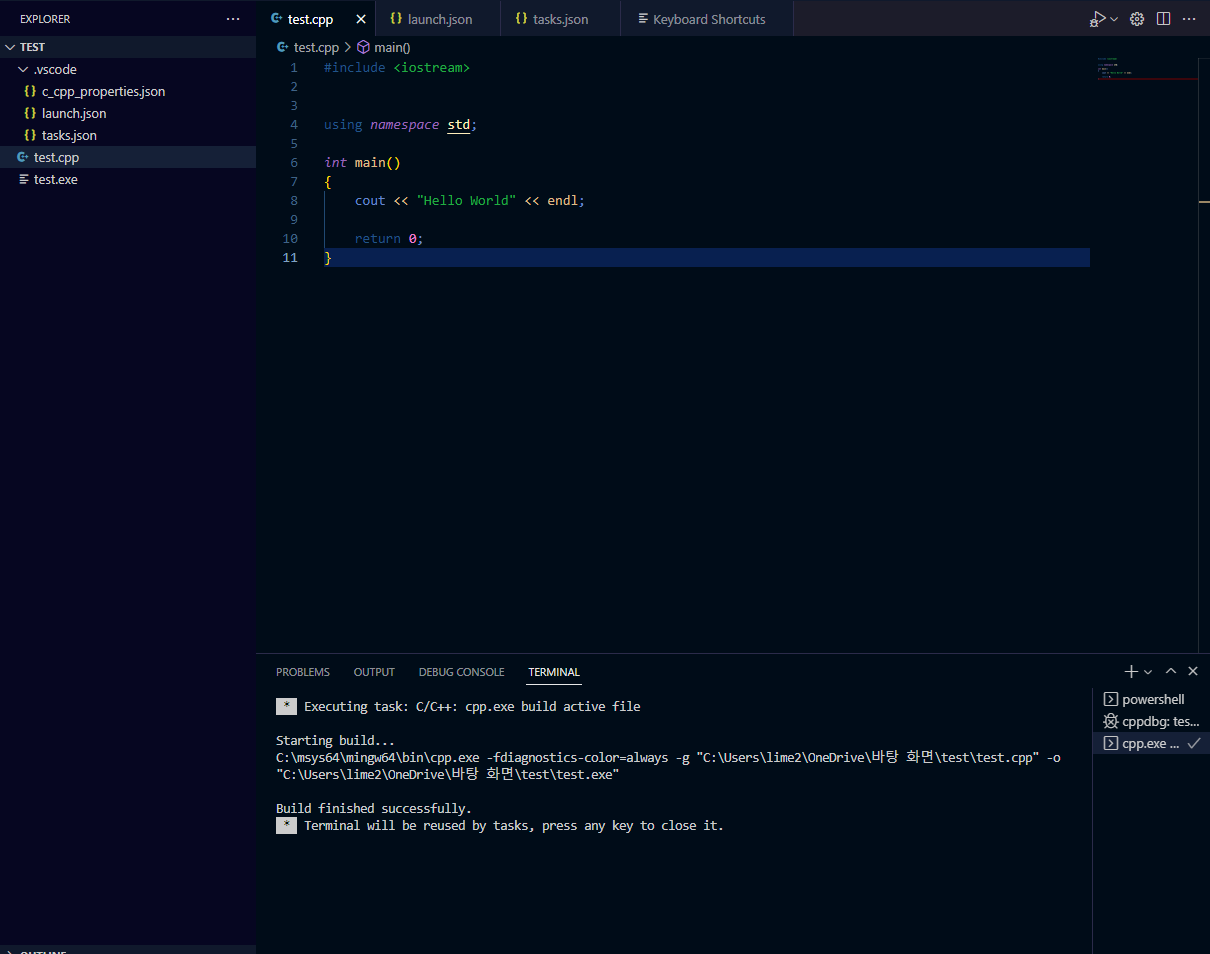
7. C / C++ 예제 프로그램 빌드 및 실행
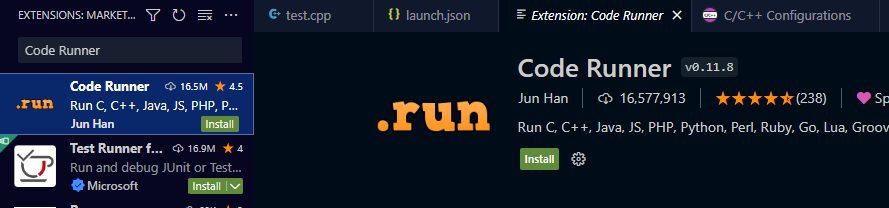
아래와 같이 extensions 추가 설치 알림이 나올시에는 install
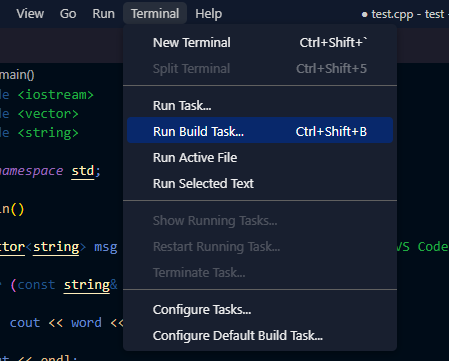
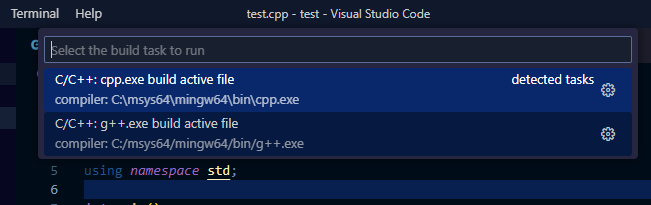
* 상단 [Terminal] Tab 내 Run Build Task (Ctrl + Shift + B) 메뉴 선택
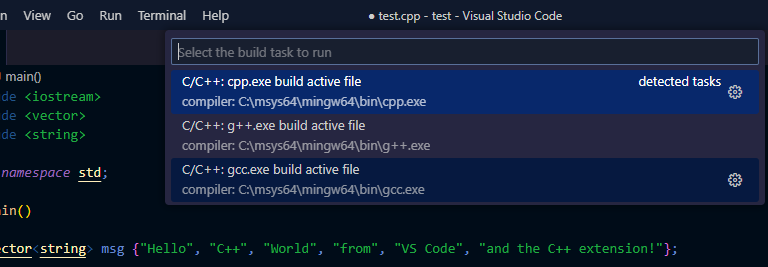
* cl.exe 가 나오는 경우에는 이것은 Microsoft 에서 만든 VisualStudio IDE 안에 있는 cl Compiler 임.
* mingw64 를 사용할 경우에는 g++.exe를 선택(아래 그림에서 두번째)
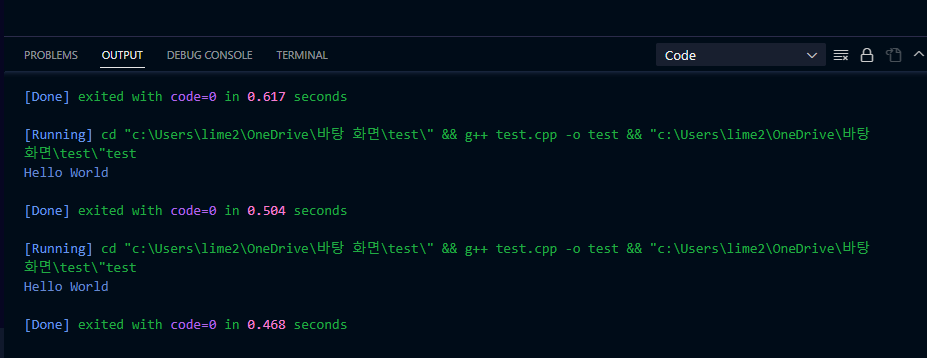
g++ :
.C파일과 .CPP 파일 모두 C++ 언어로 컴파일, C++ 라이브러리에 링크됨, 몇가지 추가 매크로 존재.
C++ 언어로 작성된 .cpp 파일을 gcc 로 컴파일시 gcc가 .cpp 파일을 컴파일한 후 C라이브러리로
링크하기 때문에 링크 에러가 발생할 수 있음
Terminal 창 선택 후 Enter 키를 누르면 창이 닫힘.
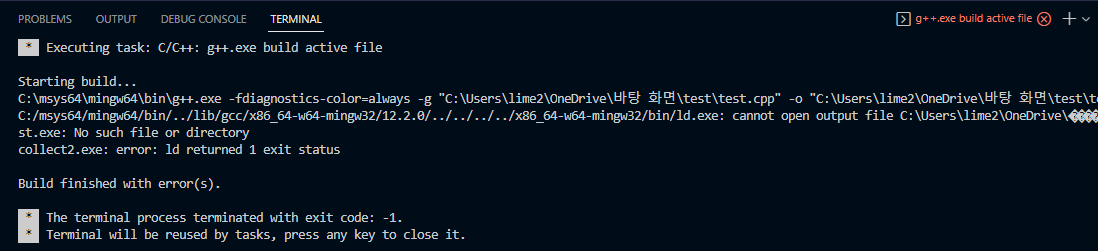
** 아래와 같이 에러창 발생시. ("빌드가 완료되었지만, 오류가 발생했습니다.")
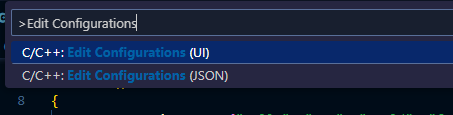
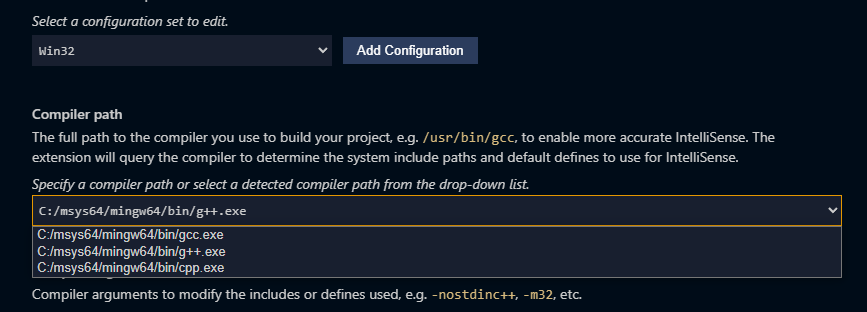
* Ctrl + Shift + P 누르고 입력창에서 C++ 입력 후 Edit Configuration(UI) 선택

* 환경 변수 설정을 제대로 하였다면 설치된 컴파일러가 인식되어 아래와 같이 뜨게 됨
C++을 Compile 할 것이기 때문에 g++.exe 선택
작성하던 코드파일로 돌아와서 Ctrl + Shift + b 로 Build하고 g++.exe 선택 후 컴파일.
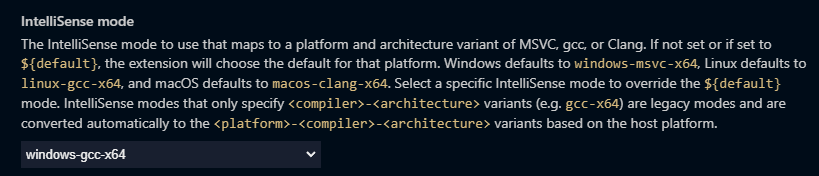
- IntelliSense mode 는 windows-gcc-x64 (C/C++ Configurations)
코드 컴파일 및 디버깅
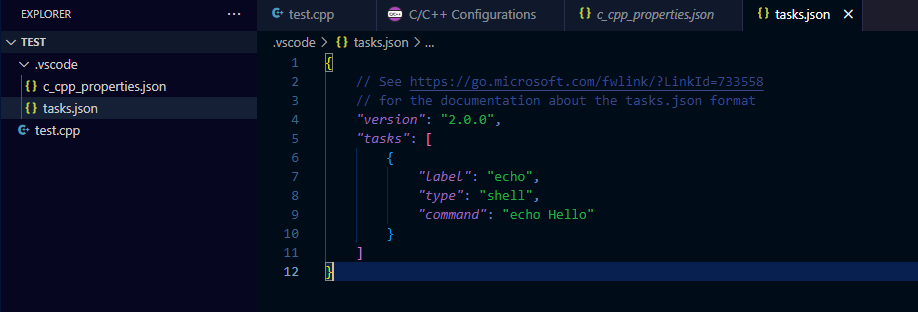
{
    "version": "2.0.0",
    "runner": "terminal",
    "type": "shell",
    "echoCommand": true,
    "presentation": {
        "reveal": "always"
    },
    "tasks": [
        {
            "label": "save and compile for C++",
            "command": "g++",
            "args": [
                "${file}",
                "-g",
                "-o",
                "${fileDirname}/${fileBasenameNoExtension}"
            ],
            "group": "build",
            "problemMatcher": {
                "fileLocation": [
                    "relative",
                    "${workspaceRoot}"
                ],
                "pattern": {
                    "regexp": "^(.*):(\\d+):(\\d+):\\s+(warning error):\\s+(.*)$",
                    "file": 1,
                    "line": 2,
                    "column": 3,
                    "severity": 4,
                    "message": 5
                }
            }
        },
        {
            "label": "save and compile for C",
            "command": "gcc",
            "args": [
                "${file}",
                "-g",
                "-o",
                "${fileDirname}/${fileBasenameNoExtension}"
            ],
            "group": "build",
            "problemMatcher": {
                "fileLocation": [
                    "relative",
                    "${workspaceRoot}"
                ],
                "pattern": {
                    "regexp": "^(.*):(\\d+):(\\d+):\\s+(warning error):\\s+(.*)$",
                    "file": 1,
                    "line": 2,
                    "column": 3,
                    "severity": 4,
                    "message": 5
                }
            }
        },
        {
            "label": "execute",
            "command": "cmd",
            "group": "test",
            "args": [
                "/C",
                "${fileDirname}\\${fileBasenameNoExtension}"
            ]
        },
        {
            "type": "cppbuild",
            "label": "C/C++: g++.exe 활성 파일 빌드",
            "command": "C:/mingw64/bin/g++.exe",
            "args": [
                "-fdiagnostics-color=always",
                "-g",
                "${file}",
                "-o",
                "${fileDirname}\\${fileBasenameNoExtension}.exe"
            ],
            "options": {
                "cwd": "C:/mingw64/bin"
            },
            "problemMatcher": [
                "$gcc"
            ],
            "group": {
                "kind": "build",
                "isDefault": true
            },
            "detail": "디버거에서 생성된 작업입니다."
        }
    ]
}
'Manual' 카테고리의 다른 글
| Virtual Box Download links [Older.Ver] (0) | 2023.01.01 |
|---|---|
| [Linux] Vim 설치 및 설정 (0) | 2023.01.01 |
| [ROS2] Install ROS2 : Foxy (0) | 2022.12.18 |
| [OpenCV]Initial Settings (0) | 2022.11.03 |
| [venv] Python 가상환경 설치 방법 (0) | 2022.10.26 |